


Homemade Gluten-Free Lactose-Free Lasagna Pt. 1 - The Pasta
There are three things that I associate with the seasons changing from summer to fall: the slow dropping of temperature, the changing of the leaves, and the move from light, bright meals to rich and hearty comfort foods. This year, for me, this meant a deep, burning craving for lasagna - but, in a household with multiple food sensitivities and a severe food allergy, filling this craving would be easier said than done.
The first step in achieving my goal of a homemade, gluten-free and lactose-free lasagna would be to create a fresh, gluten free pasta dough. A quick search for recipes yielded promising results until I realized that all of them called for rice flour which immediately ruled them out due to a severe rice allergy. I soon realized that if the lasagna I craved was to become a reality, I would have to create my own gluten (and rice) free pasta dough.
Armed with my trusty Gourmet 180mm pasta maker and fueled by my burning desire for a lasagna that both my girlfriend and I could enjoy, I set out to do just that.
The Goal
To create a fresh gluten free pasta dough that would be hearty enough to use for lasagna, without the gritty texture and over-bloated noodles that are all-too-often associated with gluten free pasta.
The Recipe
4 Eggs
1.5 cups Quinoa Flour
0.5 cup Tapioca Starch
1 tsp Xanthan Gum
Sift quinoa flour, tapioca starch and xanthan gum together to combine, form into a wide mound with a broad well in the middle. Make sure the well is large enough to hold all four eggs needed - trust me, the last thing you want is for your eggs to overflow, turning what should be the first step in a beautiful pasta dough recipe into a soggy, egg and flour volcano running rampant on your kitchen counter or work surface. I learned this the hard way so that you (hopefully) don’t have to.
With your dry ingredients combined and formed into a mound with amply-sized well, carefully break your four eggs into the well. Once all four eggs are added, slowly break up the eggs and begin to incorporate the dry ingredients.
A semi-solid (yet very sticky) mass will begin to form - this will be the base of your pasta dough. From this point, fold in all remaining dry ingredients. You can use your hands, but I found a dough scraper to be very helpful at this point. Once the mound of dry ingredients is fully incorporated, you have yourself a pasta dough - one that is very much in need of kneading.
Kneading
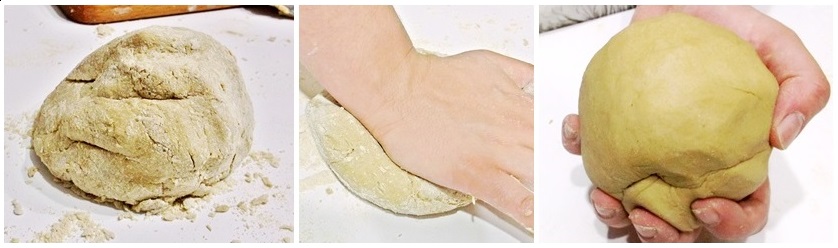
Above everything else, kneading can be what makes or breaks this recipe. Without gluten - which is typically what keeps wheat-based pasta doughs together - this dough needs to thoroughly worked to allow our binding agent (xanthan gum) to do its job. Most standard pasta recipes normally call for 8 to 10 minutes of kneading - I needed 13 minutes to achieve a texture I was happy with. You’ll be able to tell you’re done kneading when the dough develops a smooth, supple texture. If you reach 13 minutes, and your dough isn’t quite there, keep going.
To help with the kneading process I had my girlfriend (turned photographer and recipe-chronicler) put on a playlist of upbeat music. Do whatever you need to to get into your kneading-zen - your end result will thank you. Once your dough reaches the desired texture, wrap it tightly in plastic wrap, and set aside for half an hour to rest.
Rolling your Dough
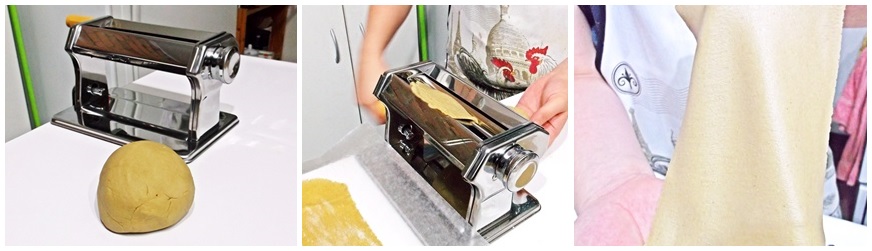
Once rested, your dough is ready to roll out into sheets. Using your dough scraper or a knife, cut the dough into quarters, and re-wrap three pieces to prevent from drying out.
Working one quarter at a time, gently flatten your dough and run it through your pasta maker with the rollers on the widest setting. Run the dough through this widest setting three times before adjusting the rollers to the next smallest size. Again, run the dough three times before proceeding to the next smallest adjustment on your pasta maker. Continue this process until your desired thickness is achieved - I went until the second-thinnest setting on my pasta maker.
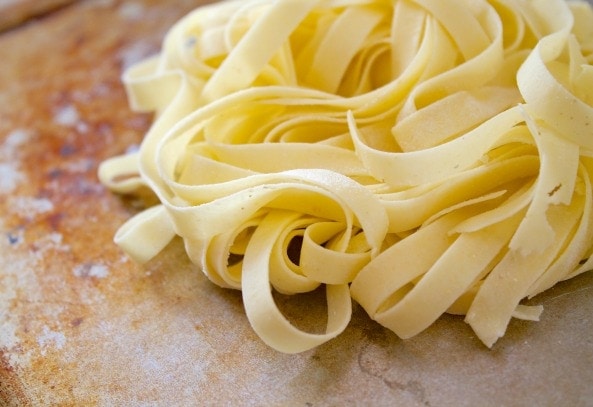
Once rolled out, rest your sheet on a piece of parchment paper lightly dusted with quinoa flour. Repeat the rolling out process until all four quarters of your dough are finished. When all four quarters are finished, cook your pasta sheets in a large pot of boiling, salted water - I cooked mine one at a time to make sure the large sheets didn’t stick to one another. Unlike dried, boxed pasta from the supermarket, this fresh pasta will cook very, very quickly - each of my sheets was finished within 90 seconds.
The End Result
With my dough rolled out into pasta sheets and cooked, I could finally evaluate my attempt at homemade gluten and rice free lasagna noodles. The result? Hearty noodles, with a smooth texture and great flavour - perfect for crafting the lasagna I’ve been craving.
Having developed the lasagna noodles, the only remaining challenge would be to build the lasagna of my dreams. Be sure to check out the second half of the recipe next week in our Homemade Gluten-Free Lactose-Free Lasagna Pt.2!

Leave a comment